How to Cook Bacon in the Oven With Aluminum Foil in 10 Easy Steps
Gather your bacon and a rimmed baking sheet lined with crumpled then smoothed aluminum foil.
Preheat your oven to 400°F and place a wire rack on the foil for crispier results. This setup helps cook your bacon evenly and makes cleanup a breeze.
Lay bacon strips evenly on the rack without overlapping.
Bake for 12–20 minutes, checking for your preferred crispness as it cooks. You’ll want that perfect balance of crispy and chewy.
Use tongs to transfer bacon to paper towels to drain excess grease.
Simply fold and discard the foil for easy cleanup.
Keep going to master tips for perfect oven-baked bacon every time.
Gather Your Ingredients and Equipment
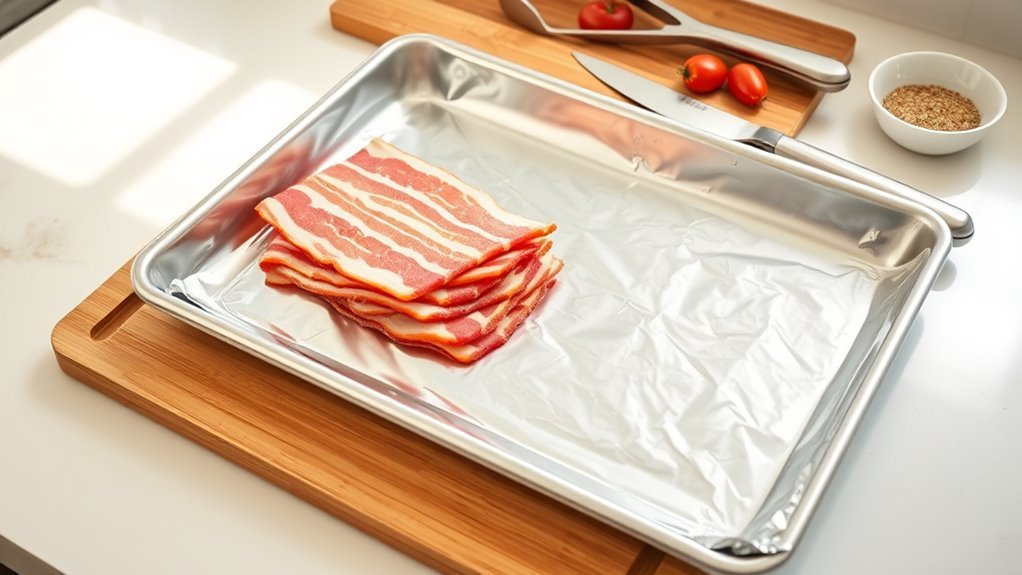
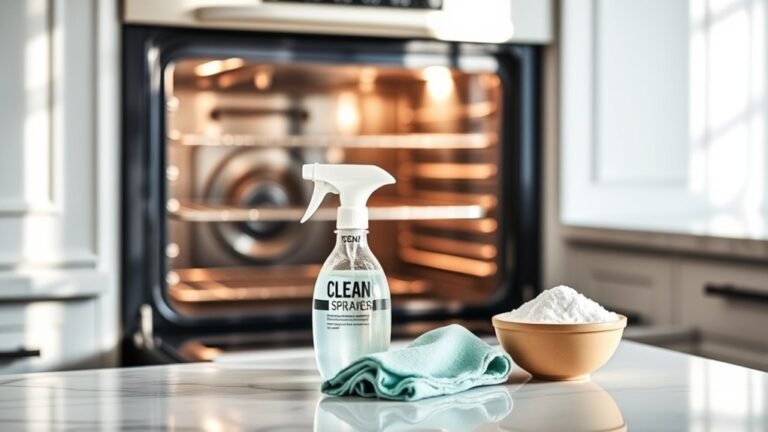
Before you start cooking, gather fresh bacon slices—usually 1 to 2 pounds depending on how much you want. Make certain you have a rimmed baking sheet lined with aluminum foil to catch the grease.
The aluminum foil not only makes cleanup easier but also helps keep the bacon from sticking to the pan. You’ll also want some paper towels on hand to drain the cooked bacon.
If you prefer extra crispy bacon, consider using a wire rack placed over the foil-lined baking sheet. This allows the fat to drip away and makes the bacon extra crispy.
Make sure your oven is clean and ready for cooking. Having all your ingredients and tools prepared before you start makes the whole process smoother and ensures your bacon turns out perfectly every time.
Preheat the Oven to 400°F
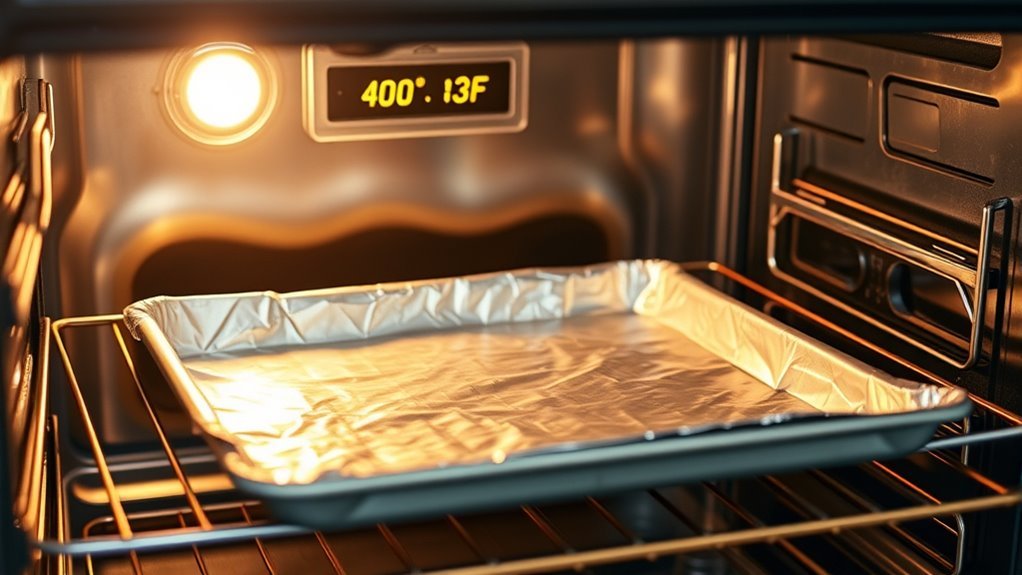
You’ll want to set your oven to 400°F and position the rack in the middle for even cooking.
Make sure to fully preheat the oven before putting the bacon in to get that perfect crispiness. This step cuts down cooking time and helps the bacon cook evenly every time.
Optimal Temperature Setting
Although it might seem simple, preheating your oven to exactly 400°F (204°C) is vital for cooking bacon evenly and achieving the perfect crispy texture without burning.
Before you place your bacon inside, make sure the oven has fully reached 400°F to guarantee even heating throughout the cooking process. If you’re unsure about your oven’s accuracy, use an oven thermometer to confirm the temperature.
Setting the oven to this ideal temperature lets your bacon cook evenly in about 12-20 minutes, balancing crispiness and preventing burning.
Here’s why 400°F works best:
- Ensures crispy, golden bacon every time
- Prevents undercooked or burnt spots
- Speeds up cooking without rushing
- Maintains consistent, even heating throughout
Preheat carefully, and your bacon will turn out perfectly!
Oven Rack Positioning
When you preheat your oven to 400°F, place the rack in the middle position to guarantee even heat reaches every slice of bacon. Positioning the oven rack on the middle rack assures uniform heat distribution, which is key to cooking bacon evenly without burning or undercooking.
The middle rack allows hot air to circulate around the bacon, promoting consistent crispiness and texture. While you can adjust the rack higher or lower for different crispiness levels—higher for more direct heat, lower for gentler cooking—the middle rack is your best bet for balanced results.
Always preheat the oven first so the rack’s heat is steady when you place the bacon in. This helps you achieve perfectly cooked bacon every time.
Preheating Time Importance
Because the oven needs time to reach 400°F, preheating for at least 10 minutes is vital before placing your bacon inside. This step guarantees even cooking and helps the bacon achieve that perfect crispiness.
Skipping preheating can cause uneven baking time, leaving some slices undercooked while others burn. When you preheat, the oven temperature stabilizes, activating its heating elements to create a consistent heat environment. Remember to wait until the oven indicator confirms it’s fully preheated.
Preheating is essential because it:
- Ensures every bacon strip cooks evenly
- Prevents frustrating undercooked or overcooked spots
- Reduces overall baking time by maintaining steady heat
- Enhances the bacon’s texture and flavor
Don’t rush preheating—it’s the secret to perfect oven-cooked bacon. Trust me, it’s worth the wait!
Line Your Baking Sheet With Aluminum Foil
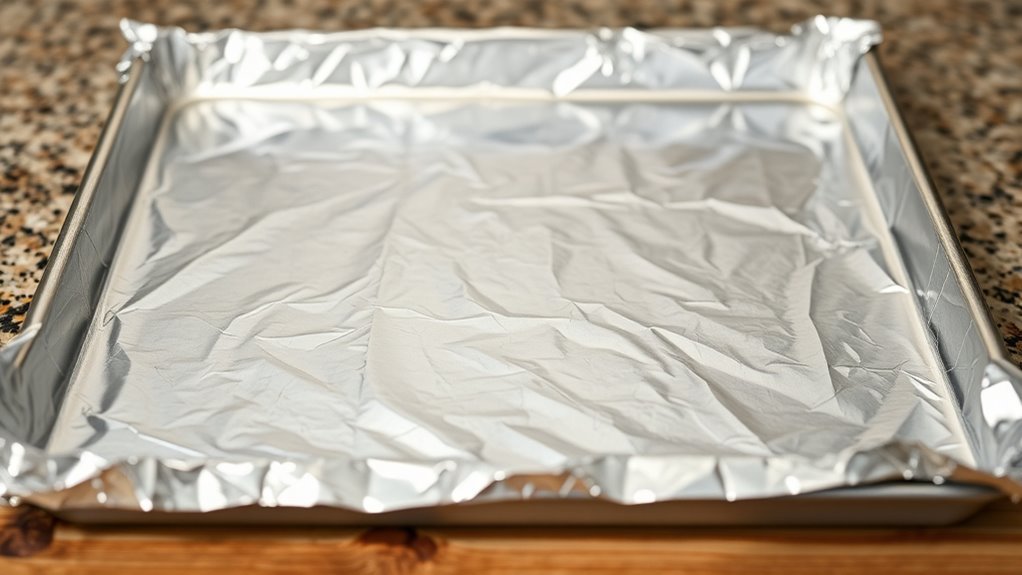
Line your rimmed baking sheet with aluminum foil to catch drips and make cleanup a breeze. Crumple the foil slightly before smoothing it out to fit the pan perfectly and prevent grease from pooling.
For even better results, place a wire rack on top to keep bacon crispy and let grease drain away easily. This little trick makes cooking and cleaning way easier!
Foil Benefits Explained
Although it might seem like a small step, covering your baking sheet with aluminum foil makes cleanup a breeze by catching all the bacon grease and drippings. This simple trick prevents stubborn grease splatters from staining your pan and damaging its surface.
Plus, aluminum foil helps guarantee even cooking by distributing heat consistently across every slice. Here’s why you’ll love using foil:
- Protects your baking sheet from grease stains and damage
- Makes cleanup quick and effortless—just toss the foil
- Promotes even cooking for perfectly crispy bacon
- Reduces mess by containing grease splatters
Proper Foil Placement
When preparing your baking sheet, make sure to cover it with a sheet of aluminum foil that extends over the edges for easy cleanup. Proper foil placement is key to cooking bacon evenly and avoiding messes.
Start by crumpling the aluminum foil slightly in your hands to make it more pliable, then lay it flat on the baking sheet, smoothing out any wrinkles. This creates a flat surface that ensures even cooking and prevents bacon from sticking.
If one sheet isn’t large enough, overlap multiple sheets without bunching or folding, which can cause uneven heat distribution. Take care to press the foil snugly against the edges of the baking sheet for secure coverage.
This prep step sets the foundation for perfectly cooked bacon every time.
Cleanup Made Easy
Using aluminum foil on your baking sheet does more than just help with even cooking—it also makes cleanup a breeze. By lining your pan with foil, you catch all the bacon grease and drippings, preventing a sticky mess.
Here’s how foil-lined baking simplifies your cleanup:
- Extend foil up the sides to contain grease splatters.
- Crumple extra foil to create a rack for crispier bacon.
After cooking, let the bacon grease cool slightly before lifting the foil. Then, fold the used foil into a ball and toss it, minimizing greasy contact.
With these simple steps, you’ll enjoy easy cleanup and save time scrubbing your pan. Foil-lined baking turns post-cooking chores into a quick, hassle-free task.
Place a Wire Rack on Top of the Foil
Before adding your bacon slices, place a wire rack on top of the foil-lined baking sheet to keep the bacon elevated above the rendered fat. This simple step guarantees your oven-baked bacon crisps evenly rather than stewing in grease.
Make sure your wire rack fits securely on the lined baking sheet and is oven-safe to avoid tipping. Elevating the bacon allows hot air to circulate all around each slice, helping it cook evenly and stay flat.
This technique guarantees perfectly crispy, evenly cooked bacon every time.
| Crispy Texture | Even Cooking | Grease-Free Delight |
|---|---|---|
| Crunchy bites | Uniform heat | Less sogginess |
| Golden brown | Flat strips | Easy cleanup |
| Perfect crisp | Better flavor | Healthy indulgence |
Arrange Bacon Strips Evenly on the Rack
You’ll want to arrange the bacon strips in a single layer on the wire rack, avoiding any overlap to guarantee even cooking.
Leave small gaps between each slice to promote crisping and prevent sticking. Using the wire rack helps heat circulate around the bacon, giving you perfectly cooked strips every time.
Avoid Overlapping Slices
Although it might be tempting to fit as many slices as possible on the rack, arranging bacon strips without overlapping guarantees they cook evenly and crisp up properly.
When you prevent overlapping, each bacon slice gets the heat it needs for even cooking, avoiding soggy or undercooked spots.
To achieve that perfect crispy bacon:
- Lay bacon slices in a single layer.
- Leave small gaps for hot air to circulate.
- Use a wire rack or crumpled foil to elevate slices.
- Avoid stacking to stop curling and sticking.
Maintain Even Spacing
When arranging bacon strips on the rack, make sure to space them evenly to promote crispness and prevent sticking. Use tongs to place each slice about 1/4 inch apart on the aluminum foil-lined rack.
This even spacing allows hot air to circulate during oven baking, ensuring uniform cooking and consistent doneness. Avoid overlapping slices and keep them flat for the best results.
| Step | Action | Reason |
|---|---|---|
| 1 | Lay bacon flat | Ensures even heat distribution |
| 2 | Space 1/4 inch apart | Promotes crispness |
| 3 | Use tongs to arrange | Maintains spacing accuracy |
| 4 | Check alignment | Prevents sticking |
Following these tips guarantees perfectly cooked bacon strips every time. Give it a try and enjoy that crispy, delicious bacon!
Utilize Wire Rack
Once you’ve spaced the bacon strips evenly, placing them on a heatproof wire rack over a foil-lined rimmed baking sheet takes your cooking to the next level. The wire rack elevates the bacon above the drippings, allowing hot air to circulate freely. This setup ensures even cooking and perfectly crispy bacon every time.
Plus, the aluminum foil-lined sheet makes cleanup a breeze. When you arrange the strips on the rack, remember to lay bacon flat in a single layer without overlapping. Use a wire rack that fits snugly over the foil-lined pan.
Keep strips evenly spaced to promote uniform crispness. And try to avoid bacon sitting in its grease—that way, you prevent sogginess. Utilizing a wire rack is a simple step that guarantees delicious, evenly cooked bacon with irresistible texture.
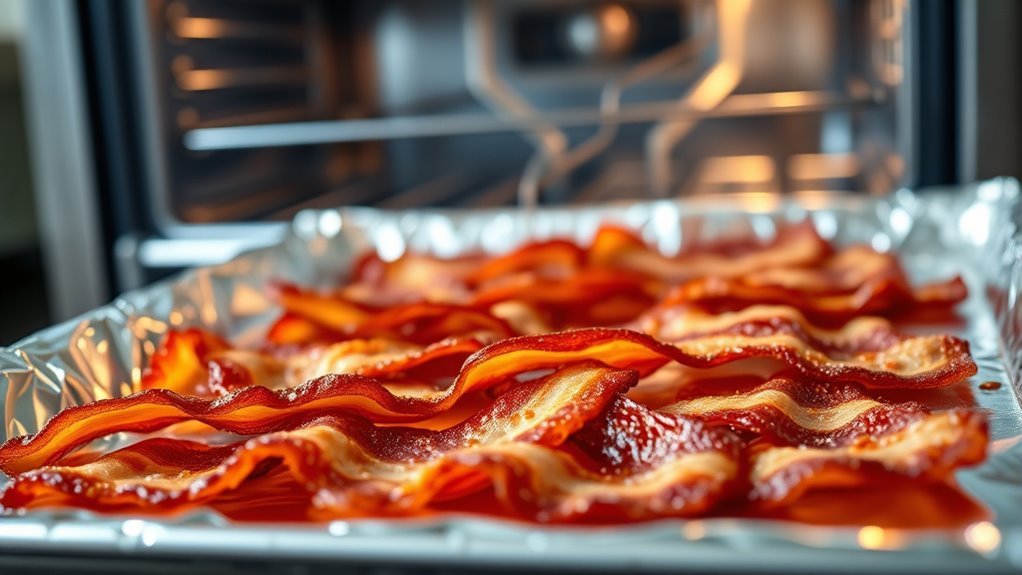
Bake the Bacon for 12 to 20 Minutes
Since baking bacon at 400°F requires careful timing, you should start checking it around 12 minutes to avoid overcooking, especially if your slices are thin. Lay the bacon on aluminum foil in the oven, making sure the slices are evenly spaced.
Begin checking bacon at 12 minutes when baking at 400°F to prevent overcooking thin slices.
Thin slices may be done by 12 minutes, while thicker cuts need closer to 18 to 20 minutes to become crispy. Keep an eye on the color—the bacon should turn a deep golden brown when ready.
You’re baking bacon in the oven to get that perfect crispy texture without the mess of a stovetop. Once it reaches your preferred crispiness, promptly remove it from the oven to prevent burning.
This simple timing ensures delicious, evenly cooked bacon every time.
Monitor Bacon for Desired Crispness
Although baking times can vary, you should start checking your bacon around the 12-minute mark to catch it at the perfect crispness. As you monitor the cooking process in the oven, keep an eye out for a deep golden-brown color and a crispy texture.
Remember, bacon continues to crisp slightly after you remove it, so it’s best to take it out just before it reaches your ideal crunch.
- Catch that satisfying golden-brown color
- Feel the crispness that makes every bite delightful
- Avoid burning by closely monitoring the cooking time
- Adjust future cooking times based on your oven and bacon thickness
Remove Bacon and Drain Excess Grease
When the bacon reaches your desired crispness, carefully lift it from the oven using tongs or a slotted spatula. This helps keep you safe from hot grease splatters.
Place the bacon strips on a plate lined with paper towels to drain and absorb excess grease. This step not only reduces greasiness but also helps the bacon stay crispy.
Let the bacon cool for 2 to 3 minutes before handling to avoid any hot grease splatters. Once cooled, you can safely discard the bacon grease by pouring it into a heatproof container or letting it solidify in the foil for easier disposal later.
Using paper towels to drain the bacon ensures you enjoy perfectly crispy, less greasy bacon every time. It’s a simple trick that really makes a difference!
Clean Up Using the Foil Liner
If you’ve lined your baking sheet with foil before cooking, cleaning up afterward becomes a breeze. The foil liner catches all the bacon grease and prevents it from sticking to your baking sheet.
Once the bacon cools slightly, carefully fold the foil into a ball, trapping the grease inside. Then, toss it in the trash or recycling—no messy scrubbing required. This simple step makes your cleanup fast and hassle-free.
Here’s why using a foil liner improves cleanup:
- Prevents stubborn grease stains on your baking sheet
- Contains bacon drippings for easy disposal
- Saves time washing dishes and scrubbing
- Keeps your oven and kitchen cleaner overall
Using aluminum foil as a liner truly streamlines your bacon-cooking routine. It’s such an easy trick that makes a big difference!
Store or Serve Your Perfect Oven-Baked Bacon
Once you’ve enjoyed your crispy oven-baked bacon, you can store any leftovers properly to keep their flavor and texture intact. Place the cooked bacon in an airtight container and refrigerate it for up to 5 days.
If you want to keep it longer, freeze the bacon in layers separated by parchment paper for up to 3 months. When it’s time to serve, reheat the bacon in a preheated oven at 350°F for 8-10 minutes or use short bursts in the microwave.
Make sure to drain any excess grease before storing to prevent sogginess. Serving your bacon warm or at room temperature ensures ideal crispness.
Conclusion
Now that you know how easy it is to cook bacon in the oven with aluminum foil, you’ll enjoy perfectly crispy strips every time without the mess.
Did you know Americans consume about 18 pounds of bacon per person annually? That’s a lot of bacon to cook!
Using this simple method not only saves time but also keeps your kitchen cleaner.
Give it a try—you’ll wonder why you ever cooked bacon any other way. Cooking bacon in the oven with aluminum foil makes cleanup a breeze and helps you achieve that perfect crispy texture every time. It’s a game-changer for bacon lovers who want delicious results without the hassle. So next time you’re craving bacon, remember these easy steps and enjoy your crispy, tasty bacon with minimal effort and mess.